Sorry it's been so long! My hubby has been out of town, which means, yes I'm getting a lot of crafting in, but no time to blog about it... uh hummm... kids! :)
I have so many things I want to show you, and most of them are about 50% of the way done... I have this problem of starting something, then I find another project that I get too excited about and end up with way too many things at the same time!
But for today I'm going to share a little about WHITEWASH PAINTING.
For those of you who have never even heard of whitewashing, basically it allows you to sill be able to see the wood underneath, yet give it lightly brushed painted look also. I think it looks super rustic and SO cute!
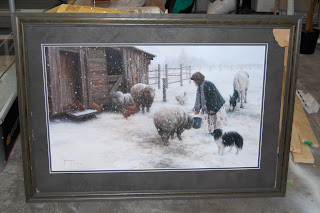
My sister in-law is super crafty and incredibly good with tools/saws/you name it! She was nice enough to help me make this frame for me the other day in just about 10 minutes! Here's the background- I bought this picture a few years ago and LOVED the picture but HATED the frame. I've never got around to getting a new one for it because I thought it would cost a ridiculous amount of money to re-frame something that big, but just recently decided to make one instead.
Start to finish:
I already started taking the picture out, but you get the idea...
Before & After...
Of course I forgot to take the very first picture, but this is the frame Kym made. I decided to stain the wood in Watco Dark Walnut (I think)...
To stain the frame all I did was use a paintbrush to brush on the stain (super easy, you can see the wood change color immediately) and let it sit to dry. If you have a sealed surface you're working with you'll want to sand it down, then start the whitewashing process. After staining, I mixed 2 parts paint to 1 part water. You really can use any color of paint, I chose one that I already had in my stash, which was just an off-white (sorry, getting the name of the color would require me to get my bum off my couch :) ) Mix it up really well and dip your brush VERY lightly into the paint. Using a soft touch, brush the paint on in long strokes, it doesn't have to be even.
This picture is super dark, I know, but you can see on the side how light and uneven the paint is on the first coat...
After you brush it on, while the paint is still wet, use a rag to wipe off some or all of the paint. The paint will soak into the wood so you won't be able to wipe it off completely. It will dry a little darker so wait and watch the color. You can add however many coats you want. This is after the first coat...
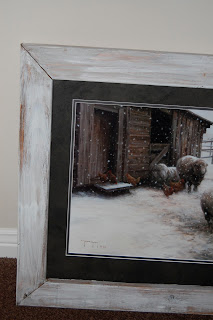
I still wanted it a little whiter, so I added one more coat and this is the final...
I LOVE how the wood still shows through...
Total cost of my new frame: $6


4 comments:
I love it!!
That looks so good!
You are amazing! I love it.
Post a Comment